Recent Post

Showing posts with label gluten-free. Show all posts

Gluten-free (Sliceable) Pizza Crust

Gluten-free (Sliceable) Pizza Crust


Though I’ve never been one for pizzas, I’ve caught myself craving one like crazy more than once these past few months (and no, I’m not pregnant), which got me thinking. What if I made a gluten-free pizza crust based on my recipe for buckwheat wraps? Hmm, that might actually work. So I grabbed my buckwheat flour, chia seeds, herbs, salt and almond milk and just played it by ear. Out came a crust that exceeded my highest expectations! And I'm only exaggerating a little!

First of all, it does not crumble into oblivion when you cut a slice, as I’ve heard many other gluten-free pizza crusts do. You can actually pick up a slice and eat it like that if you want to (although I prefer to roll them up and eat them like “pizza snails” hehe). Second of all, it’s super easy to make and doesn’t require a gazillion different ingredients. Lastly, it tastes pretty good, at least in my own, not-so-humble opinion. Let me now if you give it a try, I’d love to hear how this recipe works for other people than myself!

Gluten-free (Sliceable) Pizza Crust
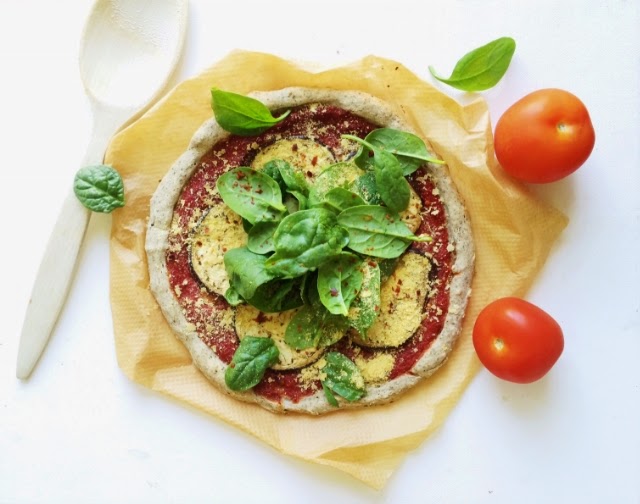

Serves: 1

50g or about 1/3 cup buckwheat flour

1 chia egg (1 tbsp ground or whole chia seeds + 3 tbsp water)

4 tbsp almond milk

½ tsp psyllium husk (optional but recommended)

Salt and herbs of choice, such as dried oregano or basil

Toppings: A thick tomato sauce loaded with oregano, sliced mushrooms, aubergine, zucchini, bell peppers, artichokes, vegan cheese… it’s up to you!

How to:
1. Pre-heat your oven to 220C. 
2. In a bowl, mix all dry ingredients then whisk in the wet until they’re all evenly combined. 3. Pre-heat a non-stick frying pan (or a skillet with a drizzle of oil on the bottom*), to medium to high heat, pour in the runny "dough" and make a big circle using a spoon. Leave it thicker around the edges for an authentic pizza feeling.
5. Fry for 4-5 minutes or until it’s firm enough to move from the pan, then transfer the crust onto a lined baking tray. 
6. Brush the crust with a bit of oil if you want to (I didn’t but this can prevent soggy bottoms). Spoon on the tomato sauce and desired toppings, then bake the pizza in the oven for 12-15 minutes.

Slice it up, sprinkle generously with nutritional yeast and eat to your heart’s content!

*Note: I have not tried frying the crust in a normal frying pan but I’m sure it’d work just as well as long as you have enough oil in there! It might burn quicker so make sure to watch it carefully and turn down the heat if you must.

Love, Tilda


Vegan Caramel Pancakes (Gluten-free) with Healthy Chocolate Mousse

Vegan Caramel Pancakes (Gluten-free) with Healthy Chocolate Mousse


Vegan Caramel Pancakes 

Serves: 1

Dry

1/3 cup (50g) buckwheat flour

2 tbsp coconut flour

1 tsp baking powder

1tsp lucuma powder

Optional: 1 tsp maca powder 
    Wet

    1 chia or flax egg (1 tbsp ground seeds mixed with 3 tbsp water, whisk until thick)

    1 medium-sized ripe banana, mashed

    1/3 cup + 1 tbsp unsweetened almond milk

    Optional: extra sweetener of choice
      How to:
        1. First, place all dry ingredients in a bowl and mix with a fork until the baking powder has been mixed in properly. 
        2. In a separate bowl, mash the banana and, with the almond milk, fold gently into the dry mixture. Add a little at a time to avoid clumps.
        3. Prepare your vegan egg by grinding the chia seeds either with a mortar and pestle or a coffee grinder. Mix the ground seeds with 3 tbsp of water and stir well. I prefer to use chia seeds because they swell so much faster than flax does, but if you've chosen to make a flax egg you'll have to let it sit in the fridge for at least 15 minutes to thicken up.
        4. Once your 'egg' is done, mix it in with the rest of the batter.
        5.Cook on medium to high heat in your oil of choice (if not using a non-stick pan) for a couple minutes on each side.

        Healthy Chocolate Mousse

        Serves: 1

        1/2 avocado

        1 tbsp + 1 tsp unsweetened almond milk

        2 tsp cacao or carob powder

        1 tbsp sweetener of choice (I used date sugar)

        How to:

          1. Simply mix all ingredients with a hender blender until smooth. Have a taste and add more sweetener if you want to. The secret here is to use a very ripe avocado and you won't be able to pick up any avocado flavor at all! It's like magic ;)

          Assemble by stacking the pancakes on top of each other with layers of the chocolate mousse in between. And of coure, finish it all off with some fresh fruit or berries!

          Have a lovely Saturday,
          Tilda

          No-bake Vegan Chocolate Tart

          No-bake Vegan Chocolate Tart

          This is one of my absolute favourite recipes; it’s super easy and quick to make and has the most wonderful, rich, chocolate-y taste, the perfect healthy alternative to satisfy those chocolate cravings!

          No-bake Vegan Chocolate Tart


          ‘Crust’

           ½ cup cashew nuts

          1/3 cup pitted dates

          1 pinch of salt 

          ¼ tsp pure vanilla extract/powder


          Chocolate Filling

          1 can full fat coconut milk, chilled overnight in the fridge  
                
          4 squares good quality dark chocolate

          ¼ cup pitted and peeled dates (soaked overnight to make them easier to peel if you’re not using fresh

          1 tbsp. cacao powder

          How to:
          1. Start by blending all of the ingredients for your crust in a food processor until thick dough forms. 
          2. Press the dough out in a lined pie dish (a small one, mine’s about 6” wide) and put it in the freezer while you prepare your filling.
          3. Open the can of coconut milk and spoon out the thick, creamy layer that has formed on top of the ‘water’ and put it in the food processor along with the dates and cacao powder. Save the leftover coconut water to add in smoothies- it’s packed with beautiful coconut flavour, trust me. You could also save a tablespoon or two of the coconut cream to decorate with.
          4. Blend the chocolate filling ingredients until they’re evenly combined- it might look like it has split but we’ll fix this in a moment. 
          5. Melt the dark chocolate and pour into the chocolate filling while it’s still hot and blend again until you have a smooth mixture of chocolaty goodness.
          6. With a spatula, pour the filling into the pie crust; decorate with coconut cream if you'd like and put it back in the freezer for a few hours (provided you can contain your inner chocolate monster for that long) to set. Eat frozen or let sit on the counter top for a few minutes for a creamier consistency!

          Please let me know if you give these a try :)

          Chocolate kisses, Tilda